


Image Theatre — One statue, three meanings

Image Theatre — One statue, three meanings
Participants use their bodies as sculpting material to build still images (tableaux vivants) that represent feelings, power relations, or social situations. Without words, one person shapes the others’ positions with gentle touch, and the group then examines and transforms the frozen image to explore oppression and imagine change.


THEME
Non-verbal Communication and Empowerment

COMPLEXITY
Beginner to Intermediate

GROUP SIZE
8-20 participants

AGE
16+

TIME
100 – 120 minutes
Objectives
- Explore emotions and social situations without relying on verbal language
- Develop body awareness and non-verbal expression skills
- Create accessible theatre for those with language barriers, speech difficulties, or autism spectrum
- Examine power dynamics and oppression through physical images
- Transform abstract concepts into concrete visual representations
Materials
- Large open space free of obstacles and furniture
- Optional: simple fabric pieces, chairs, or neutral props to enhance images
- Comfortable clothing that allows movement
Overview
Image Theatre, developed by Augusto Boal initially to work across language barriers in Peru in the early 1970s, uses the body to create still images (tableaux vivants) that represent feelings, situations, or social problems. One person acts as the “sculptor”, shaping others’ (“clay”) positions using only gentle touch and no words. The group then explores and transforms these frozen images, examining oppression and envisioning change through purely physical expression. The method emerged when Boal needed to work with indigenous communities where Spanish was not spoken.
Step-by-Step Instructions:
1. Introduction (10 mins):
Please explain that during the activity the communication will be solely through body language, with no words permitted during the image-making process. One person will be the ‘sculptor’ who gently shapes others (‘the clay’) into an image using only touch. Absolutely emphasise consent: anyone being ‘clay’ can always say no to being touched or can decline to participate entirely. Demonstrate what gentle, respectful sculpting looks like with a volunteer—showing appropriate touch on shoulders, arms, and head positioning but respecting personal boundaries.
2. Warm-up activities (15 minutes):
For this part, the facilitator can select relevant activities from the additional chapter at the end of the Toolbox (e.g. body awareness, trust exercises, or working with emotions) to support group connection, presence, and expression.
3. Individual image exploration (15 minutes):
Before making the group “sculptures”, each person creates their own solo statue showing an emotion or situation. Practise being both a sculptor and clay in pairs—taking turns sculpting each other. This builds comfort with the process and the touch involved before moving to more complex group work.
4. Real image– current reality (20 minutes):
Choose a sculptor, who can be either a volunteer or a facilitator. The sculptor creates an image showing the current reality of a problem the group has identified together (e.g., exclusion in school, inequality at work, family control, bullying, poverty, and discrimination). The sculptor physically moulded several people into the image without speaking.
Once complete, the group observes the frozen image in silence for 1-2 minutes, then discusses:
- What do you see in this image? Describe it objectively first.
- Where is the power located? Who has it? Who doesn’t?
- What relationships exist between the figures?
- What emotions are visible and embodied?
- How does this reflect the reality we know?
5. Ideal image – desired future (15 minutes):
The same sculptor or a different one creates an image showing the desired future—how we wish things could be if the oppression were overcome. This is not fantasy but achievable change. The group observes and discusses the differences from the real image. What has transformed? What new relationships exist?
6. Transitional images will be used to illustrate the path to change during a 15-minute segment.
Here’s where it gets powerful: What are the concrete steps between the real image and the ideal image? The group creates 2-3 intermediate images showing the journey of transformation. What needs to happen to move from oppression to liberation? These images make change tangible and visible.
7. Dynamisation (10 minutes, optional but powerful):
Bring the images to life in extreme slow motion (like 0.25x speed), showing the physical transformation from real to ideal. Participants move their bodies through the journey.

Debriefing and Evaluation:
Reflection Questions:
- What did you see and feel in the different images we created today?
- How did it feel to create or participate in images while working with clay?
- What surprised you about communicating without words?
- What body language communicates power? What body language communicates powerlessness?
- What did you learn about the issue we were exploring?
- For those who were sculptors: How did it feel to shape the image? What choices did you make?
- Did being physical and non-verbal reveal anything that words couldn’t?
- How can we move from the real image to the ideal image in actual life? What steps are needed?
Evaluation Criteria:
Observe participants’ comfort level with non-verbal expression, creativity and thoughtfulness in image-making, depth of observation when viewing images, ability to read and interpret body language, willingness to participate as both sculptor and clay, quality of critical reflection on images created, and respect for boundaries and consent throughout the process.
Tips for Facilitators:
- Always model gentle, respectful sculpting first before asking participants to try
- Obtain absolutely clear consent before any touching begins and remind everyone they can withdraw consent
- Start with individual statues and pair work before attempting complex multi-person group images
- Allow sufficient observation time—don’t rush past images; let them breathe
- Validate all interpretations—images are rich and have multiple valid readings; there’s no single “correct” meaning
- For groups uncomfortable with touch or from cultures where touch is problematic: create images without touching—sculptor points and participants position themselves based on verbal or visual cues
- Photograph images (with permission) to enable later reflection and documentation
- Be extremely sensitive to cultural norms around touch, gender, and personal space
- Ensure physically diverse bodies are welcomed and celebrated—all bodies can create powerful images
- Create brave space for vulnerability while maintaining clear safety boundaries
- Pay attention if anyone seems uncomfortable—check in privately during breaks

Variations and adjustments:
- Multiple Images of Happiness: Each person creates their own individual image of what happiness means to them—reveals diversity
- Complete the Image: Facilitator or one participant starts an image, then others add themselves one by one until image feels complete
- Cop in the Head: Use Image Theatre to explore internal oppression—externalize the critical or oppressive voices inside our heads
- Image and Counter- Image: Create two opposing perspectives or interpretations of the same situation
- Kaleidoscope: Show the same situation from different characters’ viewpoints—what does it look like from each person’s position?
- Image of the Future We Fear: Explore anxieties and obstacles by creating images of what we’re afraid might happen
- Family Images: Explore family dynamics and relationships through tableaux
- Sound Addition: After creating the frozen image, add sounds or one-word descriptions to each figure
- Dynamization Variations: Bring images to life in different ways—rewind, fast forward, repeat in a loop

Disclaimer:
Physical touch is centrally involved in traditional Image Theatre methodology. ALWAYS establish explicit consent practices before beginning. Participants must have the right to decline being sculptors, being clay, or participating entirely without any pressure or judgement. No one should ever be forced into physically uncomfortable or painful positions. Respect personal and cultural boundaries around touch, especially across genders. When dealing with particularly sensitive topics such as trauma, violence, and abuse, it’s important to anticipate the emergence of strong emotions due to the physical embodiment of these issues. Have a plan for emotional support.
Alternative Approach: For groups where touch is not appropriate or comfortable, use non-touch methods where the sculptor gives verbal directions or demonstrates positions, and participants position themselves. This is less powerful but still valuable.
An additional option is to pair participants by gender, as they may feel more comfortable in this setup. This can encourage participation by offering a safer and more familiar context.
Note: Image theatre can be more emotionally intense than verbal discussion because the body holds emotion. Proceed with care and awareness.
Theatre activities
Nothing found.

Contact
Iuliana Adriana PAVEL (project manager)
iuliana.pavel@a4action.ro
A4ACTION – Antim Ivireanu Culture House, Islaz Alley, Ghermănești, Snagov, Ilfov District, Romania, 077170
Co-funded by the European Union. Views and opinions expressed are however those of the author(s) only and do not necessarily reflect those of the European Union or the ANPCDEFP. Neither the European Union nor the ANPCDEFP can be held responsible for them.
The project is conducted by the following organisations: A4ACTION (Romania) – coordinator, Udruga Delta (Croatia), InterAktion (Austria), Asociación Espacio Rojo (Spain) and GAIA Museum Outsider Art (Denmark).


Building Stories Together – Stop Motion for Inclusion
Building Stories Together – Stop Motion for Inclusion
Participants collaboratively design and produce a stop-motion short film. Each group develops a short story related to a common theme chosen by the participants. Everyone contributes to different parts of the process: storyboarding, building sets, moving characters, shooting, sound, or narration. The emphasis is on collaboration and inclusion, not technical perfection.
THEME
Media, creativity, intercultural learning

COMPLEXITY
Intermediate – with some experience on stop-motion creation
GROUP SIZE
5-15
participants (working in small groups of 3–4)
AGE
15+
TIME
180-210
minutes (or can be split across multiple sessions)
Step-by-Step Instructions:
- Warm-up (15 minutes)
- Short round of introductions: each participant shares their name (if needed) and one word that represents “community” or “living together” for them.
- Give a short explanation of what stop-motion is: e.g. “Stop-motion is a way of making a video by taking lots of pictures of objects or drawings and then playing them quickly one after another, so it looks like they are moving.”
- Show short examples of stop-motion films (e.g. LEGO or paper-based animations) to inspire participants. You’ll find many examples on YouTube.
- Highlight that participants can use LEGO, blocks, figurines, or simple paper drawings to create their own animations.
- Story Development in Small Groups (60 minutes)
- In groups of 3–4, participants brainstorm a short story related to a chosen theme that can be anything related to “community”.
- They sketch the main scenes on a storyboard template (3-5 key scenes are enough).
- Decide on the characters (objects), props, and settings needed.
- Groups create the sets and characters using LEGO/objects.
- They rehearse moving characters and testing camera placement.
- Stop-Motion Filming (40–50 minutes)
- Groups animate and capture their stories scene by scene.
- Each participant takes a role (animating, taking photos, directing, narrating, etc).
- The facilitator provides technical support and time checks.
- Editing (45-60 minutes)
- After shooting, each group reviews their captured frames and decides how to assemble them into a short film.
- Participants can use simple editing apps (e.g. Stop Motion Studio, iMovie, CapCut) to adjust timing, add transitions, titles, or background music.
- Encourage them to include narration or subtitles if they want to make the message clearer across languages.
- The facilitator supports the process.
- Screening & Sharing (20–30 minutes)
- Groups present their finished stop-motion clips.
- First screening: participants watch silently.
- Second viewing: creators explain what they wanted to express; others share their interpretations.
- Afterward, invite the audience to respond: they can share what the story meant to them, ask questions to the creators, or reflect on similarities/differences with their own experiences.
- Encourage focusing on meaning and feelings rather than technical quality.
- Sharing Beyond the Group (Optional)
- If participants feel comfortable, invite them to share their finished stop-motion films on social media or community platforms.
- Discuss briefly how sharing creative work publicly can foster dialogue, raise awareness, and celebrate multicultural perspectives.
Debriefing and Evaluation:
Reflection questions:
- How was it to create a story together?
- How did you decide on roles and responsibilities?
- Were there moments when different perspectives needed to be balanced? How did you solve this?
- What did you learn from the perspectives of others?
Closing:
- Each participant shares one word that represents their experience.
Tips for Facilitators:
- Ensure every participant has a role, even small ones.
- Emphasize inclusion and cooperation over technical polish.
- If disagreements arise about the story direction, underline that multiple viewpoints can enrich the final film.
- Encourage the use of metaphors and symbols through objects – stop motion is a playful way to express deeper meanings.
- Variations and adjustments:
Thematic focus can be adapted to the group’s needs, e.g environment, cultural celebrations, etc. - The workshop can be developed during more days for a more complex result.
- Cheaper materials can be used instead of LEGO such as colourful papers, cartons, clothes
- Alternatively, the objects can be replaced with people that play different roles.
- Use larger objects or pre-cut shapes for participants with limited fine motor skills.
- Assign different roles according to participants’ strengths, e.g., directing, choosing colors, suggesting story ideas, or moving objects while someone else operates the camera.
- Instead of moving objects, participants can use photos, drawings, cut-outs, or collage images to create a stop-motion style sequence.
- Participants who can move but may have difficulty with small objects can act out roles themselves as “living objects” in the animation.
Visual arts activities
Nothing found.
Contact
Iuliana Adriana PAVEL (project manager)
iuliana.pavel@a4action.ro
A4ACTION – Antim Ivireanu Culture House, Islaz Alley, Ghermănești, Snagov, Ilfov District, Romania, 077170
Co-funded by the European Union. Views and opinions expressed are however those of the author(s) only and do not necessarily reflect those of the European Union or the ANPCDEFP. Neither the European Union nor the ANPCDEFP can be held responsible for them.
The project is conducted by the following organisations: A4ACTION (Romania) – coordinator, Udruga Delta (Croatia), InterAktion (Austria), Asociación Espacio Rojo (Spain) and GAIA Museum Outsider Art (Denmark).

Exploring home and belonging through video
Exploring home and belonging through video
Participants are invited to create short videos that express their personal understanding of home and belonging. They can capture places, objects, people, or symbolic elements that represent these ideas. Once completed, all videos are brought together into a collective short film, reflecting the diversity of experiences within the group. The activity encourages self-expression, storytelling, and dialogue, while building a shared narrative around what home and belonging mean to each participant.
THEME
Belonging, identity, self-expression

COMPLEXITY
Beginner/Intermediate
GROUP SIZE
5-10
participants
AGE
15+
TIME
150+
minutes or can be done during a longer period of time
Step-by-Step Instructions:
- Introduction (10 mins):
- You can ask the participants to bring beforehand an object that represents home to them and everyone will introduce themselves and share about their object and why it is important to them. In this way you start exploring the topic of home/belonging and how the participants relate to it, what does it mean to them.
- Mention that anything can be meaningful, there is no wrong or right answer. If the participants feel shy to open up, you can start as a facilitator or give examples.
- Exploring and filming (30-40 min)
- Invite the participants to go around the neighbourhood and take 2 short videos (10-20 sec maxim) of something that represents home to them and brings them the feeling of belonging to a place. They would have 20-30 min to do this, depending on how big the area is.
- This part can be extended to a few days, if you are working with a group for a longer time and you can invite them to document their everyday life and the moments they feel like home or like belonging to a place.
- Watching and analysing the videos(20-30 min)
- When the participants come back, ask them to send you all the videos to a common DRIVE or transfer them with a USB cable to your computer and project them in a random order.
- Watch the videos together firstly without any comments asking the participants to think in silence what they think the author wanted to share. They can take notes here, but not speak.
- Watch the videos a second time, this time asking the authors to share their thoughts and the rest of the participants their interpretations.
Invite the participants to avoid words saying if they like it, if it is a good material or not, we are not concentrating on this, but rather how it makes them feel, what do they see and what do they think it represents.
- Creating a film together (30-60 min)
- Invite participants to think about how they want to tell a story of belonging or “home” that represents their group, using the videos everyone has shared.
- Divide participants into small teams to plan the video. Each group can focus on:
- Story/script – Decide the order of the videos, what message they want to communicate, and whether they want to cut or add any parts. You can provide a simple video script template, or let them plan it more organically depending on the group.
- Music and sound – Choose appropriate music or sounds that fit the story.
- Technical editing – If someone in the group has the skills, they can edit on a phone using apps like CapCut or iMovie (iPhone). On a computer, they can use CapCut for desktop, Adobe Premiere, or Canva. If no one has editing experience, you can do the technical part while following the group’s instructions: they decide the order of clips, any cuts, transitions, and music.
- Once the video is finished, watch it together on a big screen. Use this as a starting point for debriefing and evaluation.
Debriefing and Evaluation:
Reflection Questions:
- How did you find the process of filming and identifying what home represents?
- Was it easy or difficult?
- How was the process of editing the video? How did you make the decisions?
- Are you satisfied with the final result? Do you feel it represents your feeling of belonging?
- What would you do differently?
- Close the activity asking each participant to say one word that represents their experience. (Alternative, if you have magnetic words, ask them to choose one word from there and put them together)
Tips for Facilitators:
- Create a welcoming and non-judgmental atmosphere.
- Tell the participants that anything can be identified as home, there is no wrong or right answer and give some examples such as the blue sky, a flower etc
- If working with youngsters with a migrant or refugee background, don’t conduct the workshops at the first meeting with the group and observe the room at the intro activity for any signs of distress and triggers.
- If it is difficult for the participants to identify a place that represents home or belonging, you can suggest looking for places that feel safe or inspire safety.
Variations and adjustments:
- One of the two thematics can be chosen (home or belonging) or a new one that is chosen by the facilitator depending on the purpose of the workshop and needs of the group.
- The workshop can be developed during a longer period of time, allowing the collection of more video moments and creating a longer video
- Could include a separate 2 sections about how to film and how to edit videos, if the facilitator has the skills to deliver these topics. For the present version, this is not needed, as the objective is not having a perfect result, but the process, however a basic knowledge of filming and video editing is needed.
- Besides videos, they can also take some photos and mix videos and photos in the final product.
Disclaimer:
The topic of belonging, home and identity could be triggering for certain groups and individuals, especially those that had to leave their home due to war, conflict, persecution etc, but also those that come from dysfunctional and violent families.
Visual arts activities
Nothing found.
Contact
Iuliana Adriana PAVEL (project manager)
iuliana.pavel@a4action.ro
A4ACTION – Antim Ivireanu Culture House, Islaz Alley, Ghermănești, Snagov, Ilfov District, Romania, 077170
Co-funded by the European Union. Views and opinions expressed are however those of the author(s) only and do not necessarily reflect those of the European Union or the ANPCDEFP. Neither the European Union nor the ANPCDEFP can be held responsible for them.
The project is conducted by the following organisations: A4ACTION (Romania) – coordinator, Udruga Delta (Croatia), InterAktion (Austria), Asociación Espacio Rojo (Spain) and GAIA Museum Outsider Art (Denmark).

Diversity in the natural world
Diversity in the natural world
In this activity the participants are invited to look at the natural world from a different perspective and discover the connection between plants diversity and migration and that of humans. After collecting the natural materials and discussing about diversity, they will be invited to create botanical prints/paintings with the plants they collected by pressing them on a paper, overlapping them, adding text or extra colours in the process. The process encourages self-expression, intercultural understanding and celebrating diversity.
THEME
Inclusion, self-expression, diversity

COMPLEXITY
Beginner/Intermediate
GROUP SIZE
5-15
participants
AGE
15+
TIME
90-120
min
Step-by-Step Instructions:
- Introduce the theme(10-15 min):
- What can nature teach us about diversity and migration/being different?
- Explain the steps of the workshop, first we would go together for a walk in the park/nature and collect natural elements/materials and then come back and do botanical paintings together
- Emphasize respect for nature—only collect fallen or abundant items.
- Nature walk and discussion (30+ min depending how far is the place you take the participants to)
- Ask the participants to pair up and tell them that they would change their pair for each reflection question, trying to speak with people they didn’t spoken to before
- While they will be walking and talking through the park/forest, they would also look for leaves, flowers that they would later use for their painting
- Give each pair a small bag or basket to collect natural items.
Provide reflection questions to discuss during the walk:
- Look at the plants around you and observe the differences and similarities. What do you observe?
- How do plants grow together even when they are different?
- How can you make someone feel welcome in a new place?
- Have you ever moved from one place to another? What helped you feel welcome?/ If you never moved, what would you do to make someone feel welcome in your hometown/home place?
- Lead the participants back to the workshop room and while everyone is there, ask the participants:
- To share something about the things they collected and why.
- What did you notice about the diversity of plants?
- Can you make a parallel between people and plants you’ve observed today?

- Getting into botanical printing/painting (20-30 min)
- First demonstrate how to do it, would be good to have an example with you as well, looks something like this:

- On a separate piece of paper, you would use the rolling pin with paint over the leaf/flower and then arrange it and press it on your main paper. You can use another clean paper to press the plant
- Invite the participants to try and arrange their plants with the idea of migration, diversity and belonging in mind
- They can also add words or sentences with the markers around the printed plants
- Invite participants to share their artwork and what it represents. (20 min)
Ask:
- What does your print say about you or your journey?
- How do you see diversity in your artwork?
- What did you learn from nature today?
Debriefing and Evaluation:
- What did you notice about the plants you collected? In which attributes were they different or similar?
- Did anything you saw during the walk remind you of people or communities?
- How do you think nature shows us the value of diversity?
- Some plants travel far to grow in new places. How is that similar to people’s experiences?
- What helps a plant grow in a new environment? What helps a person feel at home?
- Have you ever felt like you were “planted” in a new place? What helped you adapt?
- What story does your botanical print tell?
- Did you choose certain plants for a reason? What do they represent to you?
- How did it feel to create something using natural materials?
Tips for Facilitators:
- Offer support with pressing or handling materials.
- Use visual aids and simple language.
- Encourage ethical collection: only gather fallen or abundant materials.
- Be mindful of cultural or spiritual connections participants may have with nature or specific plants.
- Avoid using plants that may cause allergic reactions or skin irritation.
Variations and adjustments:
- Ensure the walk route is accessible to all participants. Offer alternatives (e.g., collecting materials beforehand) for those with mobility challenges.
- Provide alternatives for participants with limited mobility (e.g., pre-collected items).
- The topic could be changed to diversity of people/skills/abilities, whatever it fits better to your group.
Disclaimer:
- Discussions about migration may evoke personal or painful memories. Allow participants to share only what they feel comfortable with.
- Avoid asking direct personal questions—use metaphors (like plant migration) to create emotional distance and safety.
Visual arts activities
Nothing found.
Contact
Iuliana Adriana PAVEL (project manager)
iuliana.pavel@a4action.ro
A4ACTION – Antim Ivireanu Culture House, Islaz Alley, Ghermănești, Snagov, Ilfov District, Romania, 077170
Co-funded by the European Union. Views and opinions expressed are however those of the author(s) only and do not necessarily reflect those of the European Union or the ANPCDEFP. Neither the European Union nor the ANPCDEFP can be held responsible for them.
The project is conducted by the following organisations: A4ACTION (Romania) – coordinator, Udruga Delta (Croatia), InterAktion (Austria), Asociación Espacio Rojo (Spain) and GAIA Museum Outsider Art (Denmark).

Mixed media collage
Mixed media collage
This mixed media collage workshop invites participants to explore the meaning of inclusion through creative expression using photos, drawings, newspapers, thread, and recycled materials. Through brainstorming, collage-making, and optional stitching, participants reflect on identity, belonging, and connection while creating personal or collective artworks. The activity encourages self-expression, dialogue, and collaboration in an inclusive and accessible environment where all forms of participation and creativity are valued equally.
THEME
Inclusion, self-expression, cultural identity
COMPLEXITY
Beginner
GROUP SIZE
5-15
participants
AGE
15+
TIME
90-120
min
Step-by-Step Instructions:
- Introduction (10-15 min)
Briefly introduce the theme: Begin with a short brainstorming session. Ask:
- Do you know what “inclusion” means?
- What words or ideas come to mind when you hear it?
Write down their answers on a flipchart or board. After a few minutes, sum up by explaining the term: e.g.: “Inclusion means that everyone belongs and feels valued. It’s about making sure that all people – no matter their background, abilities, or differences – have equal opportunities to take part and be respected.”
- Demonstration and brainstorming (10-15 min)
- Share examples of collage art that use mixed media and thread.
- Encourage participants to express their identity, experiences, and hopes.
Let participants explore the materials.
- Demonstrate safe use of scissors, needles, and glue.
- Show how to sew or stitch through paper (optional for those interested).
Ask participants to sketch or brainstorm their collage idea.
- Prompt questions:
- What makes you feel included?
- What do you want others to understand about you?
- What could your threads connect to? People, ideas, feelings?
- Collage Creation (30 min)
Invite the participants to start creating their collage. The following indications can be mentioned, but not obligatory, mostly if you feel that the participants are unsure how to start.
- Choose and cut photos, newspaper clippings, or shapes.
- Use markers to draw or write on the photos.
- Sew or glue threads to connect elements or highlight areas.
- Combine materials to create depth and meaning.
- Offer help with sewing or cutting if needed.
- Closing (20 min)
- Invite participants to share their collage and the story behind it.
- Encourage respectful listening and affirming feedback.
- Option: Create a collective wall or gallery of all collages.
Debriefing and Evaluation:
- What was your favorite part of making your collage?
- Was there anything that surprised you while creating your artwork?
- Did you try something new today? How did it feel?
- What does your collage say about inclusion?
- Is there a part of your collage that feels especially important to you? Why?
- How did using thread, photos, or newspapers help you tell your story?
- For the variation of making one big collage as a group: How was it to do the collage as a team? Was it easy? Was it difficult?
- How did you decide in your group on the things you wanted or not to include in your collage?
Tips for Facilitators:
- Use inclusive language and be mindful of different abilities.
- Offer alternatives (e.g., glue instead of sewing).
- Provide visual and verbal instructions.
- Pair participants for peer support if appropriate.
- Celebrate all forms of expression—there’s no “wrong” way to collage.
- Encourage self-expression and autonomy—participants should feel free to interpret the theme of inclusion in their own way.
- Celebrate all contributions equally.
- Avoid pressuring anyone to share personal stories or explain their artwork unless they volunteer to do so.
- Ensure that all materials and tools are accessible to participants with physical, sensory, or cognitive disabilities.
- Check in regularly to see if anyone needs assistance or adaptations.
- Use clear, simple language and visual aids when possible.
Variations and adjustments:
- Participants can work in small groups, pairs or individually
- The topics can be different, for example: pairs tell each other about themselves and each makes a collage for the other person
- Also possible to create a bigger collage all together, about what inclusion means to the whole group, but would need a few more steps, such as facilitating a discussion at the beginning and collecting common and not so common answers and then asking the group to choose which ones they want to focus on
- Offer the option of breaking paper, instead of cutting for people with various disabilities
- Offer alternatives (e.g., pre-cut shapes, glue instead of sewing, verbal instructions alongside visuals).
- If participants speak different languages, consider using translation tools, visual instructions, or peer support.
Disclaimer:
Some images or themes may unintentionally trigger difficult memories or emotions. Be prepared to offer support or allow participants to step away if needed.
Visual arts activities
Nothing found.
Contact
Iuliana Adriana PAVEL (project manager)
iuliana.pavel@a4action.ro
A4ACTION – Antim Ivireanu Culture House, Islaz Alley, Ghermănești, Snagov, Ilfov District, Romania, 077170
Co-funded by the European Union. Views and opinions expressed are however those of the author(s) only and do not necessarily reflect those of the European Union or the ANPCDEFP. Neither the European Union nor the ANPCDEFP can be held responsible for them.
The project is conducted by the following organisations: A4ACTION (Romania) – coordinator, Udruga Delta (Croatia), InterAktion (Austria), Asociación Espacio Rojo (Spain) and GAIA Museum Outsider Art (Denmark).
Silent Group Drawing
Silent Group Drawing
This silent group drawing activity engages participants in non-verbal collaboration and creative expression. Working in small groups, each person contributes to a collective artwork based on shared themes such as “Our ideal community”, “Our home”, or “Our common roots”. Participants take turns adding visual elements and rotating through different sections of the drawing. The process encourages adaptability, mutual understanding, and teamwork, and is followed by a reflection on communication and group dynamics.
THEME
Community building, team building, reconnection, art expression
COMPLEXITY
Beginner
GROUP SIZE
3-15
people (in groups of 3)
AGE
6+
TIME
40
min
Step-by-Step Instructions:
1. Introduction (10-15 min)
- Introduce the participants to the activities and inform them about the rules such as:
- Drawing in silence, no speaking
- Choosing one colour
- Selecting one segment of the paper
2. Split the participants in smaller groups of min 3 and give a flipchart or A2 paper to each group. (20-25 min)
- Participants collaborate on a collective drawing without speaking in groups of 3.
- They work on large flipchart papers divided by 3 themes (1 for each participant), for example: ‘Our ideal community’, ‘Our home’, ‘Our common roots’ (themes can be adapted to suit the group’s context).
- In the beginning, each participant selects one colour and one segment of a paper and begins by adding a single visual element to it.
- After 8-10 minutes, they silently switch places with another group member and add one new element to a different segment. This silent rotation continues until everyone has contributed to each section.
3. Closing (10 min)
- After finishing, the small groups takes a look at their creations and have some minutes to discuss what they see, clarify some details.
Debriefing and Evaluation:
1. Reflection questions – in the same small groups:
- Can you identify similarities among your drawings?
- Do you have similar concepts of the topics (e.g. “Our ideal community”, “Our home”, and “Our common roots”) ?
- Do you think the final result represents your initial idea you started to work on or is it different? How?
2. Then, the whole team gets back together and takes a look at all the drawings together (hang them on the wall or place them on the ground in the middle of a circle where everyone can see them).
3. Evaluation questions – with the whole group:
- What would you share about this experience and your previous discussion?
- Do you think you worked as a team or everyone was doing their own thing?
- Was it comfortable to work in silence?
- What would have been different if you could talk in the meantime?
- What emotion is dominant after this activity?
Tips for Facilitators:
- Observe group dynamics during the drawing phase
- Provide a comfortable setup (large enough paper, space to sit or stand around, good lighting).
- Encourage reflection at the end – being silent during the drawing may bring up interesting emotional or interpersonal reactions.
Variations and adjustments:
- You can try it with verbal communication: allow talking to explore how communication helps or complicates cooperation.
- Evaluation can be done with the usage of visual cards or photos
Disclaimer:
Some participants may feel uncomfortable with silence or not reaching their wished outcome. Make it clear that there’s no “perfect” outcome and ensure a safe space for sharing emotions during the debrief.
Visual arts activities
Nothing found.
Contact
Iuliana Adriana PAVEL (project manager)
iuliana.pavel@a4action.ro
A4ACTION – Antim Ivireanu Culture House, Islaz Alley, Ghermănești, Snagov, Ilfov District, Romania, 077170
Co-funded by the European Union. Views and opinions expressed are however those of the author(s) only and do not necessarily reflect those of the European Union or the ANPCDEFP. Neither the European Union nor the ANPCDEFP can be held responsible for them.
The project is conducted by the following organisations: A4ACTION (Romania) – coordinator, Udruga Delta (Croatia), InterAktion (Austria), Asociación Espacio Rojo (Spain) and GAIA Museum Outsider Art (Denmark).

Creation of mandalas in nature
Creation of mandalas in nature: Land-art
This activity reflects on human creation and nature creation, and how through collaboration, participants can construct a visual symbol that unite both. Leaves, pinecones, stones and branches, among others, will be recollected because of their interesting aesthetic or expressive qualities, in order to create a mandala. The idea behind the mandala will be discussed within the group; environmental values will also be discussed. The process integrates communication, dialogue, listening and respect in teamwork.
THEME
Environment/ Ecology / Logical, Creative and Critical Thinking
COMPLEXITY
Beginner
GROUP SIZE
5- 10
participants
AGE
13+
TIME
45 to 90
minutes
Step-by-Step Instructions:
- Collection, selection, and organization of materials (15 min.)
- Organization: materials should be organized in small boxes or trays, placed near the work area for easy access.
- Selection and grouping: sort the materials by size, color, or type.
- Distribution: arrange the materials in concentric circles around the work area, starting from the center and moving outward.
- Group discussion for composing the mandala (15 min.)
- Gather participants in a circle.
- Provide a brief explanation about mandalas, their symbolism, and their significance in various cultures.
- Explain how land art as a visual expression is sustainable because of its ephemeral nature and how it is allowed to decay and return to the environment
- Encourage participants to share their ideas on what they want to express through their mandalas.
- Choosing the place and progressive design of the shape (20 min.)
- Each participant selects their spot within the designated circle or space.
- Participants begin creating their mandalas progressively, starting from the center and moving outward, following the logic of concentric circles.
- Visualization, feedback and sharing (20 min.)
- Organize a visualization session where participants can present their mandalas to the group.
- Encourage dialogue and constructive feedback among all participants.
- Record the mandala (with a smartphone or camera) so that it can be shown later without having to keep it intact in nature.
Debriefing and Evaluation:
At the end of the activity, there will be a group reflection on the experience: what emotions and sensations arose during the creation of the mandala, how the group discussion went and what they learned about this type of artistic expression and its approach to the respect for the environment. The exchange of opinions will be encouraged and collaboration.
Tips for Facilitators:
- Motivate participants to respect the natural environment: avoid damaging plants or animals by only using fallen elements that are within reach of the selected place for the activity.
- Promote active listening and the inclusion of all ideas during the discussion.
- Adapt the complexity of the mandala according to the age and abilities of the group.
Variations and adjustments:
- Make themed mandalas linked to the seasons, natural elements or emotions.
- Incorporate recycled non-natural materials to contrast textures and colours.
- Adapt the activity for indoor spaces using previously collected natural materials.
- Introduce ambient music to inspire creativity during the making.
Disclaimer:
This activity must always be carried out respecting the natural environment, avoiding damaging plants, animals or ecosystems. It is recommended not to leave any waste and to remove all materials after the activity if necessary to preserve the site. The safety of participants must be a priority at all times.
Visual arts activities
Nothing found.
Contact
Iuliana Adriana PAVEL (project manager)
iuliana.pavel@a4action.ro
A4ACTION – Antim Ivireanu Culture House, Islaz Alley, Ghermănești, Snagov, Ilfov District, Romania, 077170
Co-funded by the European Union. Views and opinions expressed are however those of the author(s) only and do not necessarily reflect those of the European Union or the ANPCDEFP. Neither the European Union nor the ANPCDEFP can be held responsible for them.
The project is conducted by the following organisations: A4ACTION (Romania) – coordinator, Udruga Delta (Croatia), InterAktion (Austria), Asociación Espacio Rojo (Spain) and GAIA Museum Outsider Art (Denmark).

LightPainting
LightPainting
Participants explore the possibilities of light, photography and movement through the creation of luminous drawings during a prolonged photographic exposure. Using torches and lights, they express themselves freely with their bodies in a dark room. The images captured reflect all kinds of shapes made by the participant’s movements. This method is ideal to encourage bodily and artistic expression, collaboration and basic use of technology.
THEME
Light in Motion: Expressions of the Invisible
COMPLEXITY
Medium (basic knowledge of photography required)
GROUP SIZE
5- 10
participants
AGE
13+
TIME
60 to 90
minutes
Step-by-Step Instructions:
- Introduction and delegation of functions if necessary (10 min.)
- Introduce the activity: “Imagine that light is an extension of yourself, which you can shape and direct through your movements. How does an emotion feel when it becomes a line of light? Today, we will explore the power of light to embody what we cannot see, but what we feel. Through your movements, emotions will be transformed into ephemeral, unique and energetic drawings.”
- Technical setup (10 min.)
- Set up the camera
- Place it on a tripod or stable surface and frame the scene well.
- Adjust the focus
- Focus on an object at the same distance where you will be painting and switch to manual focus mode.
- Use the Bacon Camera or Camera FV5 app if you have Android to set your mobile phone camera to manual mode. If you have an IOS phone we recommend LightRoom Mobile, Camera+.
- Set the parameters:
- Manual mode
- Close aperture (f/8 or f/11)
- Low ISO (100-200) or medium (640-1000 if you want the surroundings to show)
- Shutter speed: Bulb mode if possible, or set the estimated time
- Prepare the space (10 min.)
- Darken the room completely and eliminate any external light sources.
- Paint with light (30 min.)
- Open the shutter, paint with your chosen light source (torches, LEDs, laser pointers, LED rings, glow sticks, mobile phone screen), and close it when finished.
- Check and adjust
- If too dark: raise the ISO or paint slower
- If too bright: lower the ISO, use higher f or paint faster
- Final reflection (10 min.)
- Look at the images together and share impressions.
Debriefing and Evaluation:
- What surprised you about the result?
- How did it feel to express yourself without words, only with light?
- What difficulties did you encounter?
- What would you do differently next time?
Tips for Facilitators:
- Give a short demonstration before starting.
- Divide roles if the group is large: painters, photographers, assistants.
- Make sure you have several lights and different colours to experiment with.
- Don’t look for perfection, but for free expression.
- Be careful with that, as well as with any potential ‘pilot’ lights in the room (e.g., from a TV, remote controls, or dimmable switches). In these cases, it’s best to cover them up, as they could interfere with taking photographs.
Disclaimer:
If any participant experiences anxiety or discomfort in the dark, it is recommended to provide an option to exit or a minimal light source, ensuring the experience remains accessible and respectful for everyone.
Visual arts activities
Nothing found.
Contact
Iuliana Adriana PAVEL (project manager)
iuliana.pavel@a4action.ro
A4ACTION – Antim Ivireanu Culture House, Islaz Alley, Ghermănești, Snagov, Ilfov District, Romania, 077170
Co-funded by the European Union. Views and opinions expressed are however those of the author(s) only and do not necessarily reflect those of the European Union or the ANPCDEFP. Neither the European Union nor the ANPCDEFP can be held responsible for them.
The project is conducted by the following organisations: A4ACTION (Romania) – coordinator, Udruga Delta (Croatia), InterAktion (Austria), Asociación Espacio Rojo (Spain) and GAIA Museum Outsider Art (Denmark).

Paint your ideal neighbourhood with cardboard
Paint your ideal neighbourhood with cardboard
In this activity the neighbourhood plays as the perfect set for group bonding and strengthening of collective identity. Using paint and cardboard as creative tools, each participant represents his/her house within a common neighbourhood. The result is a collaborative artistic piece that displays the needs of their living environment as well as their desires for it. This activity promotes inclusion, creativity and group cohesion.
THEME
Collectively paint your ideal neighbourhood
COMPLEXITY
Beginner
GROUP SIZE
5- 10
participants
AGE
13+
TIME
60 to 90
minutes
Step-by-Step Instructions:
- Preparing materials (5 min.)
- Place all materials within reach of participants on the table: cardboard, scissors, paints, palettes, and supports (cardboard or thick paper)
- Making templates (5 min.)
- Cut out shapes or templates from cardboard using scissors
- Preparing the paint (5 min.)
- Arrange the paint on palettes, assigning a space for each colour
- Printing with stencils (10min)
- Load the cardboard stencil with paint by pressing it onto the palette.
- Place the stencil on the backing and press firmly to transfer the colour.
- Repeat the process with a second shape and a different colour
- Lines with the edge of the cardboard (10min)
- Test on a sheet of paper first and then apply to the support to add linear details
- Creative repetition (10min)
- Participants can repeat the procedure, combining shapes and colours to complete their design
- Sharing (10min)
- Each participant shares their work with the group, explaining what they have painted and why
Debriefing and Evaluation:
- How did it feel to paint with the others?
- What does your house and its surroundings represent?
- What problems are there in your neighbourhood?
- What would your ideal neighbourhood be like?
- How did you feel seeing your house next to others’ houses?
Tips for Facilitators:
- Make sure to create a relaxed and non-judgmental atmosphere.
- Encourage everyone to participate without worrying about “getting it right”.
- Reinforce the importance of collective work and mutual respect.
Variations and adjustments:
- Can be made with other recycled materials (sponges, bottles, etc.).
- Adapt the theme: ‘my favourite place’, ‘my ideal school’, etc.
Disclaimer:
- This activity is designed as a non-formal learning tool to promote inclusion, creativity and group cohesion in school or association contexts.
- There is no right or wrong. Some people like to think about what they want to paint, and others are working directly and expressively.
Visual arts activities
Nothing found.
Contact
Iuliana Adriana PAVEL (project manager)
iuliana.pavel@a4action.ro
A4ACTION – Antim Ivireanu Culture House, Islaz Alley, Ghermănești, Snagov, Ilfov District, Romania, 077170
Co-funded by the European Union. Views and opinions expressed are however those of the author(s) only and do not necessarily reflect those of the European Union or the ANPCDEFP. Neither the European Union nor the ANPCDEFP can be held responsible for them.
The project is conducted by the following organisations: A4ACTION (Romania) – coordinator, Udruga Delta (Croatia), InterAktion (Austria), Asociación Espacio Rojo (Spain) and GAIA Museum Outsider Art (Denmark).

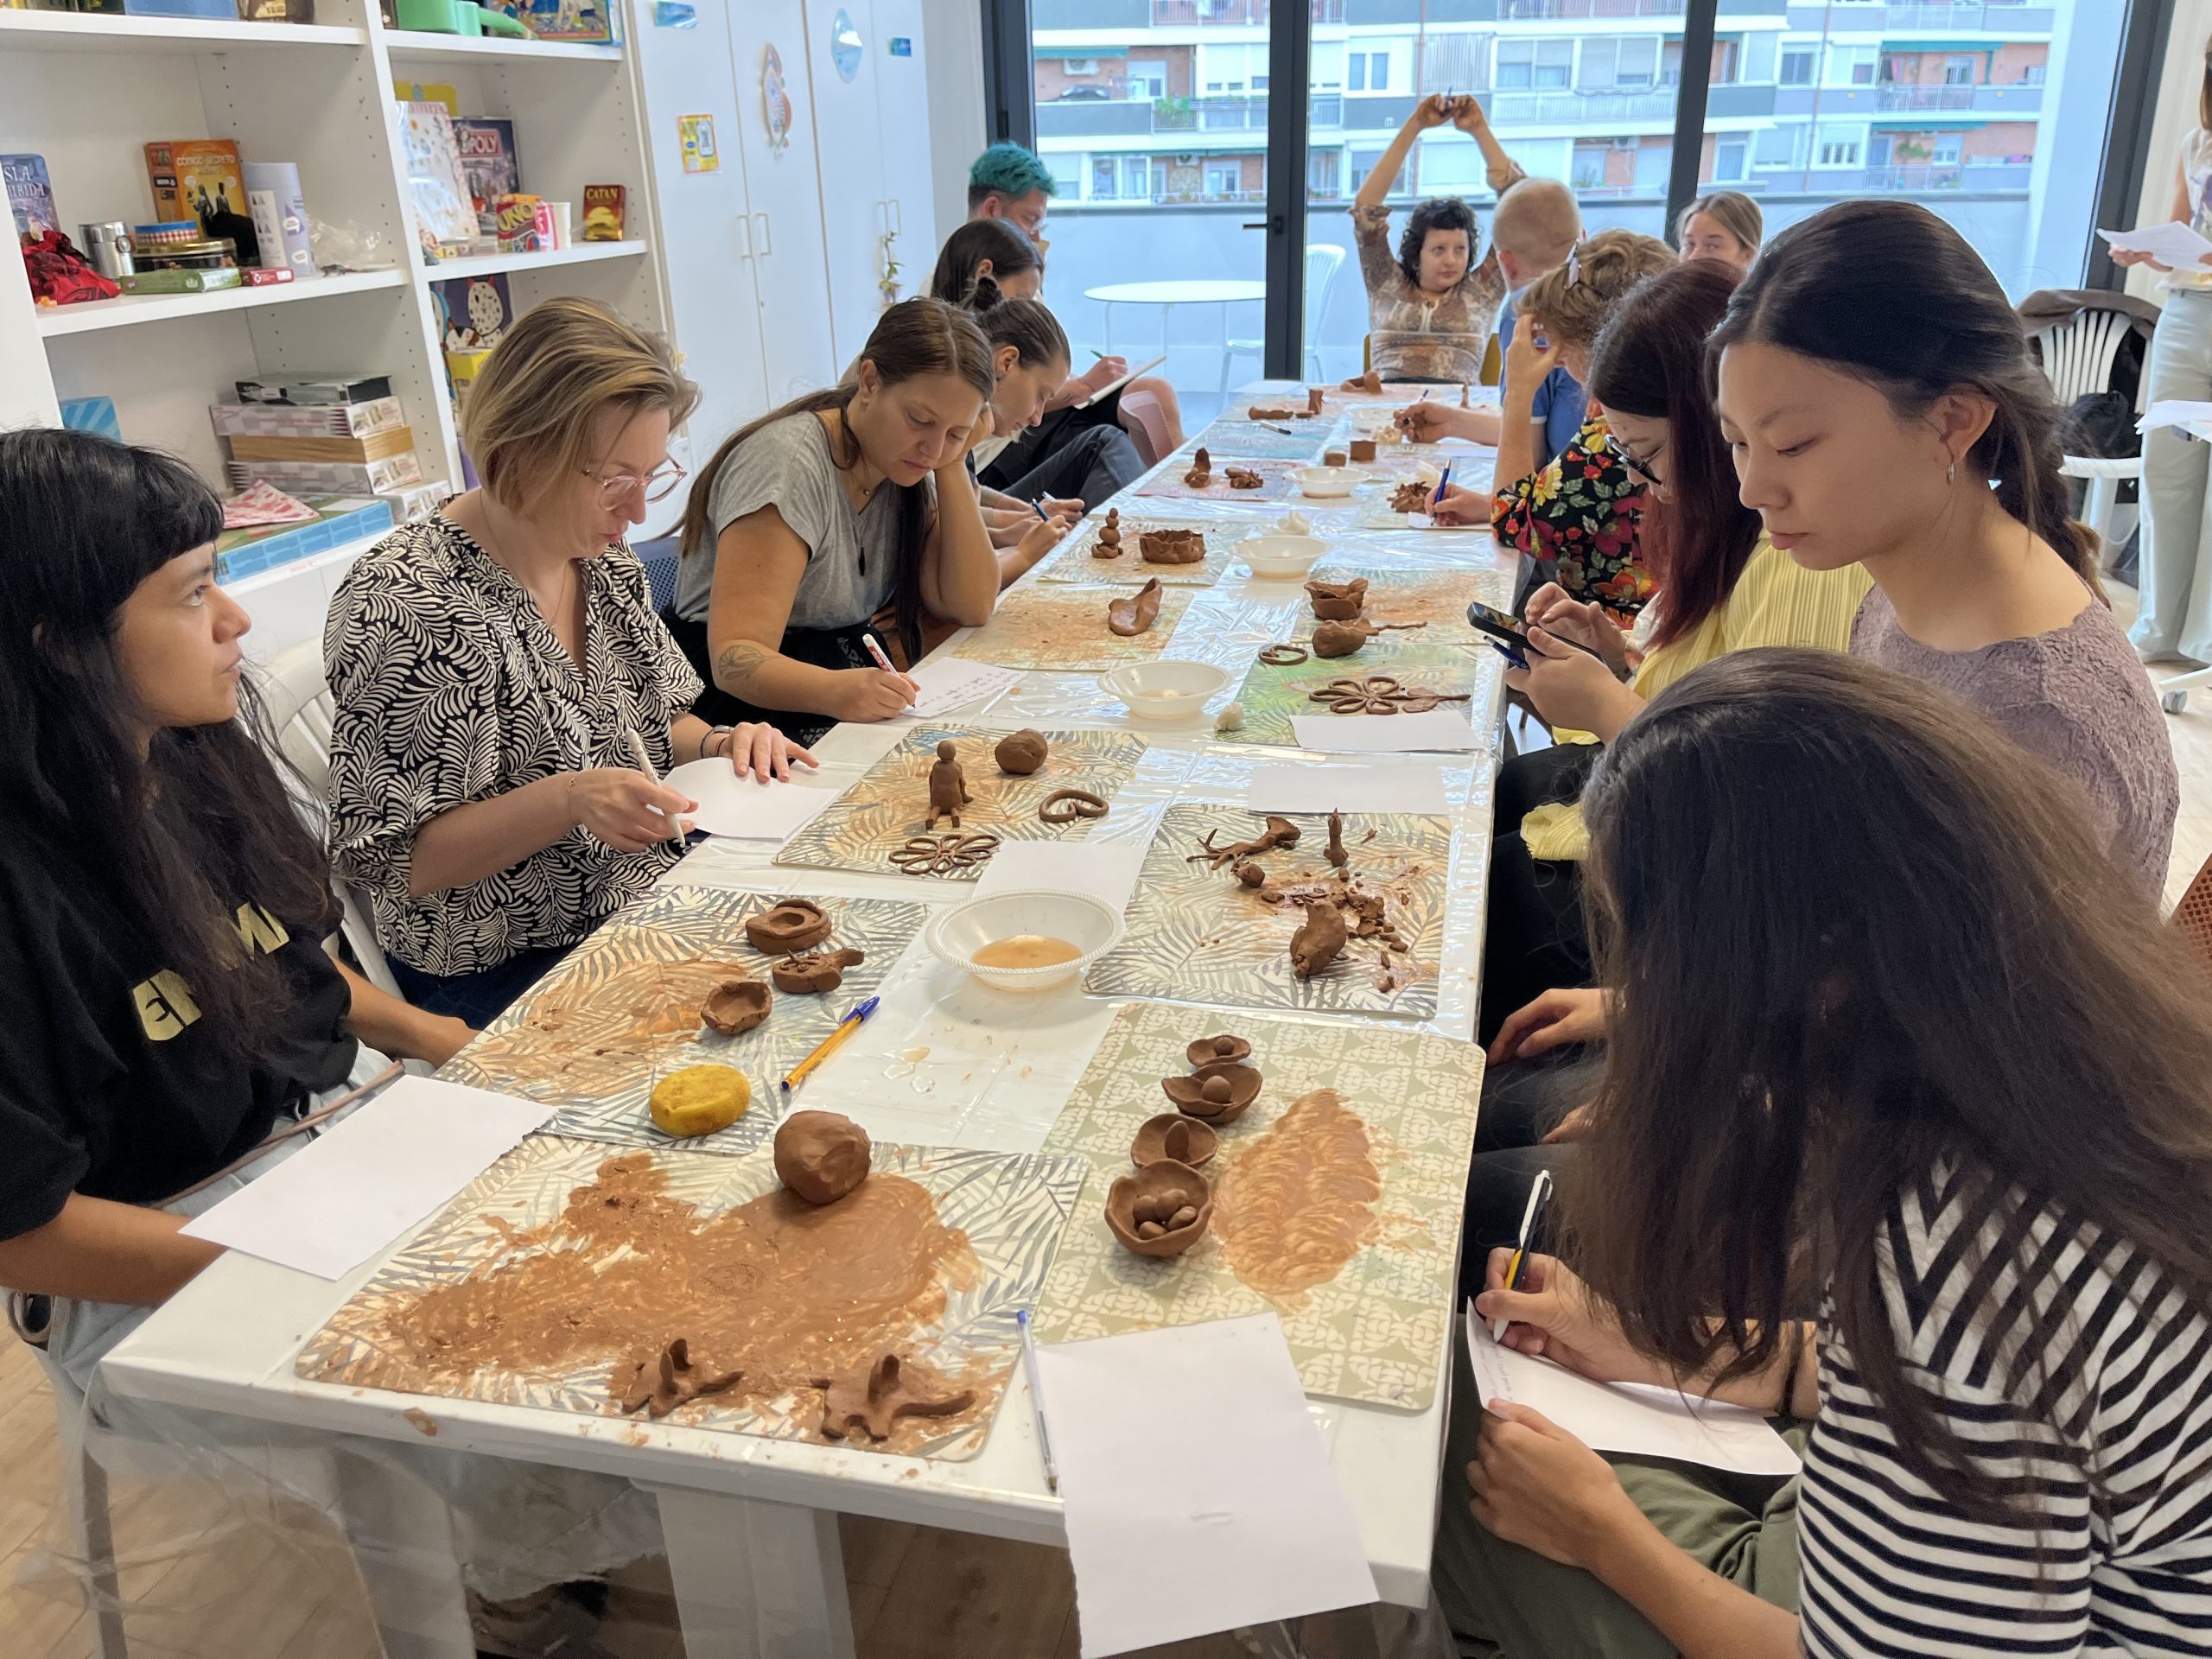
Shape Your Feelings with Clay
Shape Your Feelings with Clay
Through the tactile exploration of clay, participants unlock their creativity and let chance play a role in the creative process. With eyes closed, the only stimuli they have are the textures and forms that the hands recognize, and the final creation is shaped by the memories, feelings or experiences of each participant. Observation is done at the end as a way to reflect on the spontaneous process. This activity reinforces creativity, abstract thinking and sensory exploration.
THEME
Emotional literacy, self-awareness, and non-verbal expression
COMPLEXITY
Beginner
GROUP SIZE
5-15
participants
AGE
13+
TIME
60 to 120
minutes
Step-by-Step Instructions:
- Introduction (10 min)
- The facilitator presents clay as a versatile material that accompanies creative processes with children, young people, and adults. It is explained that its flexibility and malleability makes it a medium that connects with a primary creative level. Clay allows for tactile and kinesthetic experiences to bring people closer to their emotions. Next, the group is invited to experiment with their eyes closed in a first guided approach, accompanied by music.
- Sensory exploration (25 min)
With their eyes closed, participants place their hands on the clay to focus on the sensations. The facilitator guides them step by step:
-
- Notice the texture: smooth, rough, hard, soft.
- Grab and hold: light, heavy.
- Pinch and press with different parts of the hand: knuckles, palm, back of the hand.
- Squeeze and smooth to notice how the clay changes.
- Make a hole through it and feel the outline of the hole.
- Form a ball and recognize its softness.
- Tear off large and small pieces.
- Make a “churro” or snake by stretching the material.
The goal is to awaken sensations, release tension, and allow the hands to dialogue with the material.
- Free Creation (40 min)
Each participant creates an artwork from their own piece of clay while keeping their eyes closed. They are encouraged to:
-
- Feel whether the clay suggests its own movement or whether the participant guides it.
- Allow the shape to emerge without prior planning.
- Let themselves be surprised by what appears.
- Observation and retouches (15 min)
- Participants open their eyes and observe their creation from different angles. They can make small adjustments without transforming the essence of the piece, preserving the spontaneity of the initial process.
- Reflection and writing (20 min)
Each person writes down words, feelings, or phrases that answer questions such as:
-
- How did you feel when you touched the clay?
- What sensations arose?
- What feelings came up?
- What did it mean to express something without using words?
- Were you surprised by your creation when you opened your eyes?
- What did you observe in the work of others?
- Sharing (10 min)
- Invite participants to (voluntarily) explain their clay work and name it.
Debriefing and Evaluation:
- How did it feel to express something without using words?
- Did anything surprise you about what you created or saw in others’ work?
When closing, highlight the process experienced and the variety of answers that came up during the activity.
Tips for Facilitators:
- Emphasize that there’s no right or wrong way to shape clay.
- Offer quiet background music to support focus.
- Use clay tools or found items (twigs, shells) for imprinting as options, as well as clays of different colors
Variations and adjustments:
- Share in pairs to encourage a more intimate exchange.
- Make a symbolic gesture or small contribution to another person’s work after listening to their experience.
- Create a collective piece by bringing together fragments from each participant.
Disclaimer:
Consider that if anyone feels uncomfortable working with their eyes closed, or if they have a mental health condition that may make this difficult, it is advisable to offer alternatives such as keeping their eyes open, reducing the duration of the activity, or adapting the exercise to ensure safe and respectful participation. Be aware of the young people who may find verbal expression challenging, including migrants, refugees, neurodiverse youth, or those processing trauma.
Visual arts activities
Nothing found.
Contact
Iuliana Adriana PAVEL (project manager)
iuliana.pavel@a4action.ro
A4ACTION – Antim Ivireanu Culture House, Islaz Alley, Ghermănești, Snagov, Ilfov District, Romania, 077170
Co-funded by the European Union. Views and opinions expressed are however those of the author(s) only and do not necessarily reflect those of the European Union or the ANPCDEFP. Neither the European Union nor the ANPCDEFP can be held responsible for them.
The project is conducted by the following organisations: A4ACTION (Romania) – coordinator, Udruga Delta (Croatia), InterAktion (Austria), Asociación Espacio Rojo (Spain) and GAIA Museum Outsider Art (Denmark).