


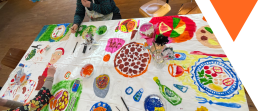
The Creative Dinner Party

The Creative Dinner Party
In this creative dinner party the participants imagine and paint their favorite meals onto a shared tablecloth. Guided by storytelling, they co-create a vibrant and colorful artwork that serves to reflect personal tastes, cultural identities, and obviously each participant’s creativity. By adding food, drinks, and utensils, the group builds a collective scene that celebrates diversity, inclusion, and self-expression in a playful and collaborative setting.

THEME
Inclusion, self-expression, cultural identity, co-creation through a creative “dinner”

COMPLEXITY
from beginner and up

GROUP SIZE
5-15
participants

AGE
13+

TIME
1
hour
Step-by-Step Instructions:
- Introduction (10 minutes)
- The piece of fabric is on the entire length of the table. It is a beautiful old garden. All the recycled material, pieces and scraps and glue are ready on the table. The friendly toy animal Lisa is sitting in the garden.
- The facilitator begins by setting the scene through storytelling. The words and level of guidance is adjusted to the group’s abilities. The facilitator can use the story of the animal toy Lisa:
- It greets the participants and asks them to sit down around the table and it tells them that this is its garden.
- Everything in the garden has fallen apart and the participants are asked to help out.
- Would you like to help me? (Everyone would love to help)
- You can find the glue and the lost pieces on the table.
- Now we will put the lost pieces together and make new fabulous sculptures.
- Individual creative work (35 min.)
- Everyone starts to work on their own sculpture.
- If needed, you could help the participants in their individual process with inspiration, practical advice etc.
- Listen carefully to the participants while they are working. What do they say about their process?
- Co-creating and completion (15 min.)
- When the participants have made their individual sculpture, the facilitator will say something like “What lovely sculptures we made. Now we will place them in the garden. And the leftover pieces, we didn’t use, we will put in the empty box”.
- Everyone places their sculpture in the garden. Now the friendly toy animal Lisa is going to visit the garden.

Debriefing and Evaluation:
The toy animal Lisa facilitates the debriefing process. Lisa asks the participants questions like:
- “What did you think of when you made this sculpture?”,
- “How was it to make the sculpture?”,
- “How was it to create with other people?”.
Make sure that Lisa examines all the sculptures and includes the participants in the conversation on the way around the garden. Maybe there are artists who want to show Lisa their sculpture themselves.
If you find it appropriate, include questions about the upcycling aspect of the workshop:
- “How do you see this now, that was trash just before?”
- “What can we bring into other aspects of our lives?
Tips for Facilitators:
- Talk positively about the process. Show your respect for everyone and the collective result.
- Remember there is no right or wrong way to be creative.
The Garbage Art Garden has become a cooperative piece of art. Everyone has contributed and expressed their creativity and artistic way of work, and The Trash Art Garden has become a very special piece of art with a lot of different expressions.

Variations and adjustments:
- Can be other settings than a garden – a village, a museum, a festival, a circus, etc. Instead of the toy animal it could be another facilitator that comes to see the garden in the end. It can be anything and have different forms, imagination and personality.

Disclaimer:
- Be aware of choking hazards.
Visual arts activities
Nothing found.

Contact
Iuliana Adriana PAVEL (project manager)
iuliana.pavel@a4action.ro
A4ACTION – Antim Ivireanu Culture House, Islaz Alley, Ghermănești, Snagov, Ilfov District, Romania, 077170
Co-funded by the European Union. Views and opinions expressed are however those of the author(s) only and do not necessarily reflect those of the European Union or the ANPCDEFP. Neither the European Union nor the ANPCDEFP can be held responsible for them.
The project is conducted by the following organisations: A4ACTION (Romania) – coordinator, Udruga Delta (Croatia), InterAktion (Austria), Asociación Espacio Rojo (Spain) and GAIA Museum Outsider Art (Denmark).


The Trash Art Garden
The Trash Art Garden
In The Trash Art Garden, participants transform recycled materials into unique sculptures through a playful storytelling experience. The participants co-create an imaginative “garden” where creativity, inclusion, and self-expression flourish. Each participant contributes their own artwork, which in the end becomes part of a shared installation. The activity fosters collaboration, celebrates diversity, and encourages reflection on creativity and upcycling in a safe, supportive environment.
THEME
Inclusion, self-expression, co-creation

COMPLEXITY
Beginner
GROUP SIZE
5-15
participants
AGE
13+
TIME
60
minutes
Step-by-Step Instructions:
- Introduction (10 minutes)
- The piece of fabric is on the entire length of the table. It is a beautiful old garden. All the recycled material, pieces and scraps and glue are ready on the table. The friendly toy animal Lisa is sitting in the garden.
- The facilitator begins by setting the scene through storytelling. The words and level of guidance is adjusted to the group’s abilities. The facilitator can use the story of the animal toy Lisa:
- It greets the participants and asks them to sit down around the table and it tells them that this is its garden.
- Everything in the garden has fallen apart and the participants are asked to help out.
- Would you like to help me? (Everyone would love to help)
- You can find the glue and the lost pieces on the table.
- Now we will put the lost pieces together and make new fabulous sculptures.
- Individual creative work (35 min.)
- Everyone starts to work on their own sculpture.
- If needed, you could help the participants in their individual process with inspiration, practical advice etc.
- Listen carefully to the participants while they are working. What do they say about their process?
- Co-creating and completion (15 min.)
- When the participants have made their individual sculpture, the facilitator will say something like “What lovely sculptures we made. Now we will place them in the garden. And the leftover pieces, we didn’t use, we will put in the empty box”.
- Everyone places their sculpture in the garden. Now the friendly toy animal Lisa is going to visit the garden.
Debriefing and Evaluation:
The toy animal Lisa facilitates the debriefing process. Lisa asks the participants questions like:
- “What did you think of when you made this sculpture?”,
- “How was it to make the sculpture?”,
- “How was it to create with other people?”.
Make sure that Lisa examines all the sculptures and includes the participants in the conversation on the way around the garden. Maybe there are artists who want to show Lisa their sculpture themselves.
If you find it appropriate, include questions about the upcycling aspect of the workshop:
- “How do you see this now, that was trash just before?”
- “What can we bring into other aspects of our lives?
Tips for Facilitators:
- Talk positively about the process. Show your respect for everyone and the collective result.
- Remember there is no right or wrong way to be creative.
The Garbage Art Garden has become a cooperative piece of art. Everyone has contributed and expressed their creativity and artistic way of work, and The Trash Art Garden has become a very special piece of art with a lot of different expressions.
Variations and adjustments:
Can be other settings than a garden – a village, a museum, a festival, a circus, etc. Instead of the toy animal it could be another facilitator that comes to see the garden in the end. It can be anything and have different forms, imagination and personality.
Disclaimer:
- Be aware of choking hazards.
Visual arts activities
Nothing found.
Contact
Iuliana Adriana PAVEL (project manager)
iuliana.pavel@a4action.ro
A4ACTION – Antim Ivireanu Culture House, Islaz Alley, Ghermănești, Snagov, Ilfov District, Romania, 077170
Co-funded by the European Union. Views and opinions expressed are however those of the author(s) only and do not necessarily reflect those of the European Union or the ANPCDEFP. Neither the European Union nor the ANPCDEFP can be held responsible for them.
The project is conducted by the following organisations: A4ACTION (Romania) – coordinator, Udruga Delta (Croatia), InterAktion (Austria), Asociación Espacio Rojo (Spain) and GAIA Museum Outsider Art (Denmark).

Shape Your Feelings with Clay
Shape Your Feelings with Clay
Through the tactile exploration of clay, participants unlock their creativity and let chance play a role in the creative process. With eyes closed, the only stimuli they have are the textures and forms that the hands recognize, and the final creation is shaped by the memories, feelings or experiences of each participant. Observation is done at the end as a way to reflect on the spontaneous process. This activity reinforces creativity, abstract thinking and sensory exploration.
THEME
Emotional literacy, self-awareness, and non-verbal expression
COMPLEXITY
Beginner
GROUP SIZE
5-15
participants
AGE
13+
TIME
60 to 120
minutes
Step-by-Step Instructions:
- Introduction (10 min)
- The facilitator presents clay as a versatile material that accompanies creative processes with children, young people, and adults. It is explained that its flexibility and malleability makes it a medium that connects with a primary creative level. Clay allows for tactile and kinesthetic experiences to bring people closer to their emotions. Next, the group is invited to experiment with their eyes closed in a first guided approach, accompanied by music.
- Sensory exploration (25 min)
With their eyes closed, participants place their hands on the clay to focus on the sensations. The facilitator guides them step by step:
-
- Notice the texture: smooth, rough, hard, soft.
- Grab and hold: light, heavy.
- Pinch and press with different parts of the hand: knuckles, palm, back of the hand.
- Squeeze and smooth to notice how the clay changes.
- Make a hole through it and feel the outline of the hole.
- Form a ball and recognize its softness.
- Tear off large and small pieces.
- Make a “churro” or snake by stretching the material.
The goal is to awaken sensations, release tension, and allow the hands to dialogue with the material.
- Free Creation (40 min)
Each participant creates an artwork from their own piece of clay while keeping their eyes closed. They are encouraged to:
-
- Feel whether the clay suggests its own movement or whether the participant guides it.
- Allow the shape to emerge without prior planning.
- Let themselves be surprised by what appears.
- Observation and retouches (15 min)
- Participants open their eyes and observe their creation from different angles. They can make small adjustments without transforming the essence of the piece, preserving the spontaneity of the initial process.
- Reflection and writing (20 min)
Each person writes down words, feelings, or phrases that answer questions such as:
-
- How did you feel when you touched the clay?
- What sensations arose?
- What feelings came up?
- What did it mean to express something without using words?
- Were you surprised by your creation when you opened your eyes?
- What did you observe in the work of others?
- Sharing (10 min)
- Invite participants to (voluntarily) explain their clay work and name it.
Debriefing and Evaluation:
- How did it feel to express something without using words?
- Did anything surprise you about what you created or saw in others’ work?
When closing, highlight the process experienced and the variety of answers that came up during the activity.
Tips for Facilitators:
- Emphasize that there’s no right or wrong way to shape clay.
- Offer quiet background music to support focus.
- Use clay tools or found items (twigs, shells) for imprinting as options, as well as clays of different colors
Variations and adjustments:
- Share in pairs to encourage a more intimate exchange.
- Make a symbolic gesture or small contribution to another person’s work after listening to their experience.
- Create a collective piece by bringing together fragments from each participant.
Disclaimer:
Consider that if anyone feels uncomfortable working with their eyes closed, or if they have a mental health condition that may make this difficult, it is advisable to offer alternatives such as keeping their eyes open, reducing the duration of the activity, or adapting the exercise to ensure safe and respectful participation. Be aware of the young people who may find verbal expression challenging, including migrants, refugees, neurodiverse youth, or those processing trauma.
Visual arts activities
Nothing found.
Contact
Iuliana Adriana PAVEL (project manager)
iuliana.pavel@a4action.ro
A4ACTION – Antim Ivireanu Culture House, Islaz Alley, Ghermănești, Snagov, Ilfov District, Romania, 077170
Co-funded by the European Union. Views and opinions expressed are however those of the author(s) only and do not necessarily reflect those of the European Union or the ANPCDEFP. Neither the European Union nor the ANPCDEFP can be held responsible for them.
The project is conducted by the following organisations: A4ACTION (Romania) – coordinator, Udruga Delta (Croatia), InterAktion (Austria), Asociación Espacio Rojo (Spain) and GAIA Museum Outsider Art (Denmark).

Paint your ideal neighbourhood with cardboard
Paint your ideal neighbourhood with cardboard
In this activity the neighbourhood plays as the perfect set for group bonding and strengthening of collective identity. Using paint and cardboard as creative tools, each participant represents his/her house within a common neighbourhood. The result is a collaborative artistic piece that displays the needs of their living environment as well as their desires for it. This activity promotes inclusion, creativity and group cohesion.
THEME
Collectively paint your ideal neighbourhood
COMPLEXITY
Beginner
GROUP SIZE
5- 10
participants
AGE
13+
TIME
60 to 90
minutes
Step-by-Step Instructions:
- Preparing materials (5 min.)
- Place all materials within reach of participants on the table: cardboard, scissors, paints, palettes, and supports (cardboard or thick paper)
- Making templates (5 min.)
- Cut out shapes or templates from cardboard using scissors
- Preparing the paint (5 min.)
- Arrange the paint on palettes, assigning a space for each colour
- Printing with stencils (10min)
- Load the cardboard stencil with paint by pressing it onto the palette.
- Place the stencil on the backing and press firmly to transfer the colour.
- Repeat the process with a second shape and a different colour
- Lines with the edge of the cardboard (10min)
- Test on a sheet of paper first and then apply to the support to add linear details
- Creative repetition (10min)
- Participants can repeat the procedure, combining shapes and colours to complete their design
- Sharing (10min)
- Each participant shares their work with the group, explaining what they have painted and why
Debriefing and Evaluation:
- How did it feel to paint with the others?
- What does your house and its surroundings represent?
- What problems are there in your neighbourhood?
- What would your ideal neighbourhood be like?
- How did you feel seeing your house next to others’ houses?
Tips for Facilitators:
- Make sure to create a relaxed and non-judgmental atmosphere.
- Encourage everyone to participate without worrying about “getting it right”.
- Reinforce the importance of collective work and mutual respect.
Variations and adjustments:
- Can be made with other recycled materials (sponges, bottles, etc.).
- Adapt the theme: ‘my favourite place’, ‘my ideal school’, etc.
Disclaimer:
- This activity is designed as a non-formal learning tool to promote inclusion, creativity and group cohesion in school or association contexts.
- There is no right or wrong. Some people like to think about what they want to paint, and others are working directly and expressively.
Visual arts activities
Nothing found.
Contact
Iuliana Adriana PAVEL (project manager)
iuliana.pavel@a4action.ro
A4ACTION – Antim Ivireanu Culture House, Islaz Alley, Ghermănești, Snagov, Ilfov District, Romania, 077170
Co-funded by the European Union. Views and opinions expressed are however those of the author(s) only and do not necessarily reflect those of the European Union or the ANPCDEFP. Neither the European Union nor the ANPCDEFP can be held responsible for them.
The project is conducted by the following organisations: A4ACTION (Romania) – coordinator, Udruga Delta (Croatia), InterAktion (Austria), Asociación Espacio Rojo (Spain) and GAIA Museum Outsider Art (Denmark).

LightPainting
LightPainting
Participants explore the possibilities of light, photography and movement through the creation of luminous drawings during a prolonged photographic exposure. Using torches and lights, they express themselves freely with their bodies in a dark room. The images captured reflect all kinds of shapes made by the participant’s movements. This method is ideal to encourage bodily and artistic expression, collaboration and basic use of technology.
THEME
Light in Motion: Expressions of the Invisible

COMPLEXITY
Medium (basic knowledge of photography required)
GROUP SIZE
5- 10
participants
AGE
13+
TIME
60 to 90
minutes
Step-by-Step Instructions:
- Introduction and delegation of functions if necessary (10 min.)
- Introduce the activity: “Imagine that light is an extension of yourself, which you can shape and direct through your movements. How does an emotion feel when it becomes a line of light? Today, we will explore the power of light to embody what we cannot see, but what we feel. Through your movements, emotions will be transformed into ephemeral, unique and energetic drawings.”
- Technical setup (10 min.)
- Set up the camera
- Place it on a tripod or stable surface and frame the scene well.
- Adjust the focus
- Focus on an object at the same distance where you will be painting and switch to manual focus mode.
- Use the Bacon Camera or Camera FV5 app if you have Android to set your mobile phone camera to manual mode. If you have an IOS phone we recommend LightRoom Mobile, Camera+.
- Set the parameters:
- Manual mode
- Close aperture (f/8 or f/11)
- Low ISO (100-200) or medium (640-1000 if you want the surroundings to show)
- Shutter speed: Bulb mode if possible, or set the estimated time
- Prepare the space (10 min.)
- Darken the room completely and eliminate any external light sources.
- Paint with light (30 min.)
- Open the shutter, paint with your chosen light source (torches, LEDs, laser pointers, LED rings, glow sticks, mobile phone screen), and close it when finished.
- Check and adjust
- If too dark: raise the ISO or paint slower
- If too bright: lower the ISO, use higher f or paint faster
- Final reflection (10 min.)
- Look at the images together and share impressions.
Debriefing and Evaluation:
- What surprised you about the result?
- How did it feel to express yourself without words, only with light?
- What difficulties did you encounter?
- What would you do differently next time?
Tips for Facilitators:
- Give a short demonstration before starting.
- Divide roles if the group is large: painters, photographers, assistants.
- Make sure you have several lights and different colours to experiment with.
- Don’t look for perfection, but for free expression.
- Be careful with that, as well as with any potential ‘pilot’ lights in the room (e.g., from a TV, remote controls, or dimmable switches). In these cases, it’s best to cover them up, as they could interfere with taking photographs.
Disclaimer:
If any participant experiences anxiety or discomfort in the dark, it is recommended to provide an option to exit or a minimal light source, ensuring the experience remains accessible and respectful for everyone.
Visual arts activities
Nothing found.
Contact
Iuliana Adriana PAVEL (project manager)
iuliana.pavel@a4action.ro
A4ACTION – Antim Ivireanu Culture House, Islaz Alley, Ghermănești, Snagov, Ilfov District, Romania, 077170
Co-funded by the European Union. Views and opinions expressed are however those of the author(s) only and do not necessarily reflect those of the European Union or the ANPCDEFP. Neither the European Union nor the ANPCDEFP can be held responsible for them.
The project is conducted by the following organisations: A4ACTION (Romania) – coordinator, Udruga Delta (Croatia), InterAktion (Austria), Asociación Espacio Rojo (Spain) and GAIA Museum Outsider Art (Denmark).

Creation of mandalas in nature
Creation of mandalas in nature: Land-art
This activity reflects on human creation and nature creation, and how through collaboration, participants can construct a visual symbol that unite both. Leaves, pinecones, stones and branches, among others, will be recollected because of their interesting aesthetic or expressive qualities, in order to create a mandala. The idea behind the mandala will be discussed within the group; environmental values will also be discussed. The process integrates communication, dialogue, listening and respect in teamwork.
THEME
Environment/ Ecology / Logical, Creative and Critical Thinking
COMPLEXITY
Beginner
GROUP SIZE
5- 10
participants
AGE
13+
TIME
45 to 90
minutes
Step-by-Step Instructions:
- Collection, selection, and organization of materials (15 min.)
- Organization: materials should be organized in small boxes or trays, placed near the work area for easy access.
- Selection and grouping: sort the materials by size, color, or type.
- Distribution: arrange the materials in concentric circles around the work area, starting from the center and moving outward.
- Group discussion for composing the mandala (15 min.)
- Gather participants in a circle.
- Provide a brief explanation about mandalas, their symbolism, and their significance in various cultures.
- Explain how land art as a visual expression is sustainable because of its ephemeral nature and how it is allowed to decay and return to the environment
- Encourage participants to share their ideas on what they want to express through their mandalas.
- Choosing the place and progressive design of the shape (20 min.)
- Each participant selects their spot within the designated circle or space.
- Participants begin creating their mandalas progressively, starting from the center and moving outward, following the logic of concentric circles.
- Visualization, feedback and sharing (20 min.)
- Organize a visualization session where participants can present their mandalas to the group.
- Encourage dialogue and constructive feedback among all participants.
- Record the mandala (with a smartphone or camera) so that it can be shown later without having to keep it intact in nature.
Debriefing and Evaluation:
At the end of the activity, there will be a group reflection on the experience: what emotions and sensations arose during the creation of the mandala, how the group discussion went and what they learned about this type of artistic expression and its approach to the respect for the environment. The exchange of opinions will be encouraged and collaboration.
Tips for Facilitators:
- Motivate participants to respect the natural environment: avoid damaging plants or animals by only using fallen elements that are within reach of the selected place for the activity.
- Promote active listening and the inclusion of all ideas during the discussion.
- Adapt the complexity of the mandala according to the age and abilities of the group.
Variations and adjustments:
- Make themed mandalas linked to the seasons, natural elements or emotions.
- Incorporate recycled non-natural materials to contrast textures and colours.
- Adapt the activity for indoor spaces using previously collected natural materials.
- Introduce ambient music to inspire creativity during the making.
Disclaimer:
This activity must always be carried out respecting the natural environment, avoiding damaging plants, animals or ecosystems. It is recommended not to leave any waste and to remove all materials after the activity if necessary to preserve the site. The safety of participants must be a priority at all times.
Visual arts activities
Nothing found.
Contact
Iuliana Adriana PAVEL (project manager)
iuliana.pavel@a4action.ro
A4ACTION – Antim Ivireanu Culture House, Islaz Alley, Ghermănești, Snagov, Ilfov District, Romania, 077170
Co-funded by the European Union. Views and opinions expressed are however those of the author(s) only and do not necessarily reflect those of the European Union or the ANPCDEFP. Neither the European Union nor the ANPCDEFP can be held responsible for them.
The project is conducted by the following organisations: A4ACTION (Romania) – coordinator, Udruga Delta (Croatia), InterAktion (Austria), Asociación Espacio Rojo (Spain) and GAIA Museum Outsider Art (Denmark).
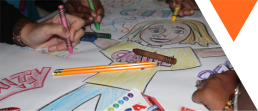
Silent Group Drawing
Silent Group Drawing
This silent group drawing activity engages participants in non-verbal collaboration and creative expression. Working in small groups, each person contributes to a collective artwork based on shared themes such as “Our ideal community”, “Our home”, or “Our common roots”. Participants take turns adding visual elements and rotating through different sections of the drawing. The process encourages adaptability, mutual understanding, and teamwork, and is followed by a reflection on communication and group dynamics.
THEME
Community building, team building, reconnection, art expression
COMPLEXITY
Beginner
GROUP SIZE
3-15
people (in groups of 3)
AGE
6+
TIME
40
min
Step-by-Step Instructions:
1. Introduction (10-15 min)
- Introduce the participants to the activities and inform them about the rules such as:
- Drawing in silence, no speaking
- Choosing one colour
- Selecting one segment of the paper
2. Split the participants in smaller groups of min 3 and give a flipchart or A2 paper to each group. (20-25 min)
- Participants collaborate on a collective drawing without speaking in groups of 3.
- They work on large flipchart papers divided by 3 themes (1 for each participant), for example: ‘Our ideal community’, ‘Our home’, ‘Our common roots’ (themes can be adapted to suit the group’s context).
- In the beginning, each participant selects one colour and one segment of a paper and begins by adding a single visual element to it.
- After 8-10 minutes, they silently switch places with another group member and add one new element to a different segment. This silent rotation continues until everyone has contributed to each section.
- Closing (10 min)
- After finishing, the small groups takes a look at their creations and have some minutes to discuss what they see, clarify some details.
Debriefing and Evaluation:
1. Reflection questions – in the same small groups:
- Can you identify similarities among your drawings?
- Do you have similar concepts of the topics (e.g. “Our ideal community”, “Our home”, and “Our common roots”) ?
- Do you think the final result represents your initial idea you started to work on or is it different? How?
2. Then, the whole team gets back together and takes a look at all the drawings together (hang them on the wall or place them on the ground in the middle of a circle where everyone can see them).
3. Evaluation questions – with the whole group:
- What would you share about this experience and your previous discussion?
- Do you think you worked as a team or everyone was doing their own thing?
- Was it comfortable to work in silence?
- What would have been different if you could talk in the meantime?
- What emotion is dominant after this activity?
Tips for Facilitators:
- Observe group dynamics during the drawing phase
- Provide a comfortable setup (large enough paper, space to sit or stand around, good lighting).
- Encourage reflection at the end – being silent during the drawing may bring up interesting emotional or interpersonal reactions.
Variations and adjustments:
- You can try it with verbal communication: allow talking to explore how communication helps or complicates cooperation.
- Evaluation can be done with the usage of visual cards or photos
Disclaimer:
Some participants may feel uncomfortable with silence or not reaching their wished outcome. Make it clear that there’s no “perfect” outcome and ensure a safe space for sharing emotions during the debrief.
Visual arts activities
Nothing found.
Contact
Iuliana Adriana PAVEL (project manager)
iuliana.pavel@a4action.ro
A4ACTION – Antim Ivireanu Culture House, Islaz Alley, Ghermănești, Snagov, Ilfov District, Romania, 077170
Co-funded by the European Union. Views and opinions expressed are however those of the author(s) only and do not necessarily reflect those of the European Union or the ANPCDEFP. Neither the European Union nor the ANPCDEFP can be held responsible for them.
The project is conducted by the following organisations: A4ACTION (Romania) – coordinator, Udruga Delta (Croatia), InterAktion (Austria), Asociación Espacio Rojo (Spain) and GAIA Museum Outsider Art (Denmark).

Mixed media collage
Mixed media collage
This mixed media collage workshop invites participants to explore the meaning of inclusion through creative expression using photos, drawings, newspapers, thread, and recycled materials. Through brainstorming, collage-making, and optional stitching, participants reflect on identity, belonging, and connection while creating personal or collective artworks. The activity encourages self-expression, dialogue, and collaboration in an inclusive and accessible environment where all forms of participation and creativity are valued equally.
THEME
Inclusion, self-expression, cultural identity
COMPLEXITY
Beginner
GROUP SIZE
5-15
participants
AGE
15+
TIME
90-120
min
Step-by-Step Instructions:
- Introduction (10-15 min)
Briefly introduce the theme: Begin with a short brainstorming session. Ask:
- Do you know what “inclusion” means?
- What words or ideas come to mind when you hear it?
Write down their answers on a flipchart or board. After a few minutes, sum up by explaining the term: e.g.: “Inclusion means that everyone belongs and feels valued. It’s about making sure that all people – no matter their background, abilities, or differences – have equal opportunities to take part and be respected.”
- Demonstration and brainstorming (10-15 min)
- Share examples of collage art that use mixed media and thread.
- Encourage participants to express their identity, experiences, and hopes.
Let participants explore the materials.
- Demonstrate safe use of scissors, needles, and glue.
- Show how to sew or stitch through paper (optional for those interested).
Ask participants to sketch or brainstorm their collage idea.
- Prompt questions:
- What makes you feel included?
- What do you want others to understand about you?
- What could your threads connect to? People, ideas, feelings?
- Collage Creation (30 min)
Invite the participants to start creating their collage. The following indications can be mentioned, but not obligatory, mostly if you feel that the participants are unsure how to start.
- Choose and cut photos, newspaper clippings, or shapes.
- Use markers to draw or write on the photos.
- Sew or glue threads to connect elements or highlight areas.
- Combine materials to create depth and meaning.
- Offer help with sewing or cutting if needed.
- Closing (20 min)
- Invite participants to share their collage and the story behind it.
- Encourage respectful listening and affirming feedback.
- Option: Create a collective wall or gallery of all collages.
Debriefing and Evaluation:
- What was your favorite part of making your collage?
- Was there anything that surprised you while creating your artwork?
- Did you try something new today? How did it feel?
- What does your collage say about inclusion?
- Is there a part of your collage that feels especially important to you? Why?
- How did using thread, photos, or newspapers help you tell your story?
- For the variation of making one big collage as a group: How was it to do the collage as a team? Was it easy? Was it difficult?
- How did you decide in your group on the things you wanted or not to include in your collage?
Tips for Facilitators:
- Use inclusive language and be mindful of different abilities.
- Offer alternatives (e.g., glue instead of sewing).
- Provide visual and verbal instructions.
- Pair participants for peer support if appropriate.
- Celebrate all forms of expression—there’s no “wrong” way to collage.
- Encourage self-expression and autonomy—participants should feel free to interpret the theme of inclusion in their own way.
- Celebrate all contributions equally.
- Avoid pressuring anyone to share personal stories or explain their artwork unless they volunteer to do so.
- Ensure that all materials and tools are accessible to participants with physical, sensory, or cognitive disabilities.
- Check in regularly to see if anyone needs assistance or adaptations.
- Use clear, simple language and visual aids when possible.
Variations and adjustments:
- Participants can work in small groups, pairs or individually
- The topics can be different, for example: pairs tell each other about themselves and each makes a collage for the other person
- Also possible to create a bigger collage all together, about what inclusion means to the whole group, but would need a few more steps, such as facilitating a discussion at the beginning and collecting common and not so common answers and then asking the group to choose which ones they want to focus on
- Offer the option of breaking paper, instead of cutting for people with various disabilities
- Offer alternatives (e.g., pre-cut shapes, glue instead of sewing, verbal instructions alongside visuals).
- If participants speak different languages, consider using translation tools, visual instructions, or peer support.
Disclaimer:
Some images or themes may unintentionally trigger difficult memories or emotions. Be prepared to offer support or allow participants to step away if needed.
Visual arts activities
Nothing found.
Contact
Iuliana Adriana PAVEL (project manager)
iuliana.pavel@a4action.ro
A4ACTION – Antim Ivireanu Culture House, Islaz Alley, Ghermănești, Snagov, Ilfov District, Romania, 077170
Co-funded by the European Union. Views and opinions expressed are however those of the author(s) only and do not necessarily reflect those of the European Union or the ANPCDEFP. Neither the European Union nor the ANPCDEFP can be held responsible for them.
The project is conducted by the following organisations: A4ACTION (Romania) – coordinator, Udruga Delta (Croatia), InterAktion (Austria), Asociación Espacio Rojo (Spain) and GAIA Museum Outsider Art (Denmark).

Diversity in the natural world
Diversity in the natural world
In this activity the participants are invited to look at the natural world from a different perspective and discover the connection between plants diversity and migration and that of humans. After collecting the natural materials and discussing about diversity, they will be invited to create botanical prints/paintings with the plants they collected by pressing them on a paper, overlapping them, adding text or extra colours in the process. The process encourages self-expression, intercultural understanding and celebrating diversity.
THEME
Inclusion, self-expression, diversity

COMPLEXITY
Beginner/Intermediate
GROUP SIZE
5-15
participants
AGE
15+
TIME
90-120
min
Step-by-Step Instructions:
- Introduce the theme(10-15 min):
- What can nature teach us about diversity and migration/being different?
- Explain the steps of the workshop, first we would go together for a walk in the park/nature and collect natural elements/materials and then come back and do botanical paintings together
- Emphasize respect for nature—only collect fallen or abundant items.
- Nature walk and discussion (30+ min depending how far is the place you take the participants to)
- Ask the participants to pair up and tell them that they would change their pair for each reflection question, trying to speak with people they didn’t spoken to before
- While they will be walking and talking through the park/forest, they would also look for leaves, flowers that they would later use for their painting
- Give each pair a small bag or basket to collect natural items.
Provide reflection questions to discuss during the walk:
- Look at the plants around you and observe the differences and similarities. What do you observe?
- How do plants grow together even when they are different?
- How can you make someone feel welcome in a new place?
- Have you ever moved from one place to another? What helped you feel welcome?/ If you never moved, what would you do to make someone feel welcome in your hometown/home place?
- Lead the participants back to the workshop room and while everyone is there, ask the participants:
- To share something about the things they collected and why.
- What did you notice about the diversity of plants?
- Can you make a parallel between people and plants you’ve observed today?
 Getting into botanical printing/painting (20-30 min)
- First demonstrate how to do it, would be good to have an example with you as well, looks something like this:
- On a separate piece of paper, you would use the rolling pin with paint over the leaf/flower and then arrange it and press it on your main paper. You can use another clean paper to press the plant
- Invite the participants to try and arrange their plants with the idea of migration, diversity and belonging in mind
- They can also add words or sentences with the markers around the printed plants
- Invite participants to share their artwork and what it represents. (20 min)
Ask:
- What does your print say about you or your journey?
- How do you see diversity in your artwork?
- What did you learn from nature today?
Debriefing and Evaluation:
- What did you notice about the plants you collected? In which attributes were they different or similar?
- Did anything you saw during the walk remind you of people or communities?
- How do you think nature shows us the value of diversity?
- Some plants travel far to grow in new places. How is that similar to people’s experiences?
- What helps a plant grow in a new environment? What helps a person feel at home?
- Have you ever felt like you were “planted” in a new place? What helped you adapt?
- What story does your botanical print tell?
- Did you choose certain plants for a reason? What do they represent to you?
- How did it feel to create something using natural materials?
Tips for Facilitators:
- Offer support with pressing or handling materials.
- Use visual aids and simple language.
- Encourage ethical collection: only gather fallen or abundant materials.
- Be mindful of cultural or spiritual connections participants may have with nature or specific plants.
- Avoid using plants that may cause allergic reactions or skin irritation.
Variations and adjustments:
- Ensure the walk route is accessible to all participants. Offer alternatives (e.g., collecting materials beforehand) for those with mobility challenges.
- Provide alternatives for participants with limited mobility (e.g., pre-collected items).
- The topic could be changed to diversity of people/skills/abilities, whatever it fits better to your group.
Disclaimer:
- Discussions about migration may evoke personal or painful memories. Allow participants to share only what they feel comfortable with.
- Avoid asking direct personal questions—use metaphors (like plant migration) to create emotional distance and safety.
Visual arts activities
Nothing found.
Contact
Iuliana Adriana PAVEL (project manager)
iuliana.pavel@a4action.ro
A4ACTION – Antim Ivireanu Culture House, Islaz Alley, Ghermănești, Snagov, Ilfov District, Romania, 077170
Co-funded by the European Union. Views and opinions expressed are however those of the author(s) only and do not necessarily reflect those of the European Union or the ANPCDEFP. Neither the European Union nor the ANPCDEFP can be held responsible for them.
The project is conducted by the following organisations: A4ACTION (Romania) – coordinator, Udruga Delta (Croatia), InterAktion (Austria), Asociación Espacio Rojo (Spain) and GAIA Museum Outsider Art (Denmark).

Exploring home and belonging through video
Istraživanje doma i pripadnosti kroz video
Osobe su pozvane izraditi kratke videozapise koji izražavaju njihovo osobno razumijevanje doma i pripadnosti. Mogu snimati mjesta, predmete, ljude ili simboličke elemente koji predstavljaju te pojmove. Nakon izrade, svi videozapisi se spajaju u zajednički kratki film koji odražava raznolikost iskustava unutar grupe. Aktivnost potiče samoizražavanje, pripovijedanje i dijalog te gradi zajedničku narativnu cjelinu o tome što dom i pripadnost znače svakoj osobi.
TEMA
Pripadnost, identitet, samoizražavanje
RAZINA
Poletna/srednja
VELIČINA GRUPE
5-10
osoba
DOB
15+
TRAJANJE
150+
minuta ili kroz duži period
Provedba korak po korak:
-
Uvod (10 min):
Zamolite osobe da unaprijed donesu predmet koji za njih predstavlja dom. Na početku se svi predstave i podijele priču o svom predmetu te objasne zašto im je važan. Na taj način započinjete istraživanje teme doma i pripadnosti te načina na koji se osobe s njom povezuju i što ona za njih znači.
Naglasite da svaki predmet može biti značajan te da ne postoje točni ili pogrešni odgovori. Ako se osobe ustručavaju započeti, možete započeti vi kao facilitator/ica ili dati nekoliko primjera.
2. Istraživanje i snimanje (30–40 min)
Pozovite osobr da prošeću susjedstvom i snime dva kratka videozapisa (najviše 10–20 sekundi) nečega što za njih predstavlja dom ili u njima budi osjećaj pripadnosti određenom mjestu. Za ovaj zadatak mogu imati 20–30 minuta, ovisno o veličini područja koje istražuju.
Ovaj dio aktivnosti može se produžiti na nekoliko dana ako radite s grupom tijekom duljeg razdoblja. U tom slučaju osobe možete potaknuti da dokumentiraju svoju svakodnevicu i trenutke u kojima se osjećaju „kao kod kuće” ili povezani s nekim mjestom.
3. Gledanje i analiza videozapisa (20–30 min)
Po povratku zamolite osobe da pošalju sve videozapise u zajedničku mapu (npr. na Drive) ili ih prenesu na računalo putem USB kabela. Videozapise zatim prikažite slučajnim redoslijedom.
Prvo gledanje odvija se u tišini, bez komentara. Zamolite osobe da razmisle što misle da je autor/ica želio7željela prenijeti. Mogu voditi bilješke, ali ne razgovaraju.
Videozapise zatim pogledajte drugi put. Ovoga puta autori7ce objašnjavaju svoje namjere, a ostali dijele vlastite interpretacije.
Potaknite osobe da izbjegavaju komentare poput „sviđa mi se” ili „nije dobro snimljeno”. Fokus nije na tehničkoj kvaliteti, nego na osjećajima koje video izaziva, onome što vide i onome što misle da video predstavlja.
4. Zajednička izrada filma (30–60 min)
Pozovite osobe da razmisle kako žele ispričati zajedničku priču o pripadnosti ili domu koristeći videozapise koje su svi snimili.
Podijelite osobe u manje timove koji će planirati film. Svaki tim može biti zadužen za određeni aspekt:
- Priča/scenarij – odlučiti redoslijed videozapisa, poruku koju žele prenijeti te hoće li pojedine dijelove skratiti ili dodati nove. Možete ponuditi jednostavan predložak scenarija ili dopustiti slobodnije planiranje, ovisno o grupi.
- Glazba i zvuk – odabrati glazbu ili zvučne efekte koji odgovaraju priči.
- Tehnička montaža – ako netko u grupi ima iskustva, može montirati film na mobilnom telefonu koristeći aplikacije poput CapCuta ili iMovieja (za iPhone). Na računalu se mogu koristiti CapCut Desktop, Adobe Premiere ili Canva. Ako nitko nema iskustva s montažom, facilitator/ica može odraditi tehnički dio prema uputama grupe. Osobr odlučuju o redoslijedu kadrova, rezovima, prijelazima i glazbi.
Nakon što je film dovršen, pogledajte ga zajedno na velikom ekranu. Iskoristite zajedničko gledanje kao polazište za refleksiju i evaluaciju.
Refleksija i evaluacija:
Pitanja za refleksiju:
Kako vam je bilo snimati i prepoznati što za vas predstavlja dom?
Je li vam to bilo lako ili teško?
Kako vam je bilo tijekom procesa montaže? Kako ste donosili odluke?
Jeste li zadovoljni konačnim rezultatom? Smatrate li da predstavlja vaš osjećaj pripadnosti?
Što biste sljedeći put napravili drugačije?
Završetak aktivnosti:
Na kraju zamolite svaku osobu da podijeli jednu riječ koja najbolje opisuje njezino iskustvo.
Alternativa: Ako imate set magnetskih riječi ili kartica s riječima, pozovite osobe da odaberu onu koja najbolje predstavlja njihovo iskustvo te ih zajedno složite u zajedničku kompoziciju ili „oblak riječi”.
Varijacije i prilagodbe:
Može se odabrati samo jedna od dviju tema (dom ili pripadnost) ili neka druga tema koju facilitator/ica odabire prema ciljevima radionice i potrebama grupe.
Radionica se može provoditi tijekom duljeg vremenskog razdoblja, što omogućuje prikupljanje većeg broja videozapisa i izradu dužeg zajedničkog filma.
Ako facilitator/ica posjeduje potrebna znanja, mogu se dodati zasebni moduli o osnovama snimanja i montaže videa. U ovoj verziji radionice to nije nužno jer je naglasak na procesu, a ne na tehničkoj savršenosti, iako je osnovno poznavanje snimanja i uređivanja videa poželjno.
Osim videozapisa, osobe mogu snimati i fotografije te ih kombinirati s video materijalom u završnom filmu.
Visual arts activities
Nothing found.
Contact
Iuliana Adriana PAVEL (project manager)
iuliana.pavel@a4action.ro
A4ACTION – Antim Ivireanu Culture House, Islaz Alley, Ghermănești, Snagov, Ilfov District, Romania, 077170
Co-funded by the European Union. Views and opinions expressed are however those of the author(s) only and do not necessarily reflect those of the European Union or the ANPCDEFP. Neither the European Union nor the ANPCDEFP can be held responsible for them.
The project is conducted by the following organisations: A4ACTION (Romania) – coordinator, Udruga Delta (Croatia), InterAktion (Austria), Asociación Espacio Rojo (Spain) and GAIA Museum Outsider Art (Denmark).